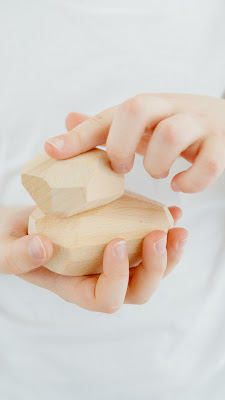
Cabochon cutting is the most common style of gem
cutting. Don't get fooled by the word "common'. It requires persistence,
time, and effort to learn this skill completely.
If you are starting, it is
always good to practice rough materials sold specifically for cutting
practice.
 |
| Cut sharp edges |
Cabochon Cutting Machines
Cabochon carving tools can be expensive or cheap,
depending on your budget and wallet size. The common cabochon cutting machines
are Genie and Lortone.
Genie - Genie is the well-known cabochon cutter machine that Diamond Pacific
made, it was made with mounted six permanent wheels that include the first
two to be 100-100 grit diamonds.
They were backed up with a foam that adapts to
the curvature of the stones.
Genie machine was
supported with two movable Geyer that provide water as a coolant or lubrication
and a flat disk mounted on the end to enable you to change the polishing method
whenever you want.
Genie machine is one of the best cabochon cutting
machines since it doesn't let you spend a lot of time changing accessories, and
its wheels last a long time.
It isn't portable because it is large, heavy, and
expensive.
Lortone - This machine is slightly cheaper than Genie,
but it has excellent features that make it an excellent machine. It has an
in-built expanding drum, saw, silicon carbide grinding wheel, and a flat disk
for polishing.
Rock Rascal - Rock Rascal has been around for a long time,
meaning it can last long without wearing out.
It is the least expensive of the
three machines in this article and is made with only one station. This draws
you into a position of changing accessories now and then.
Cabochon Cutting Techniques
A (Properly Charging Ceramic Laps, n.d.) article stated that there are various techniques to shape cabochons,
but the oval one is the commonest. I will be talking about cutting an oval
shape.
Slabbing
Slabbing requires a saw that will enable cutting
the cabs into 1/4 to 1/3 slices thickness. This enables you to figure out the
largest piece of cab you can cut by placing the template over the slab.
If, of
course, your element is a solid color, it is the very first step you take. If
there is a pattern, the most eye arraign will be about size and shape. The more the pattern
changes the more you continue to round the top, so it is more of guesswork.
If you have chosen your preferred cutting part,
marking it with an aluminum pencil will help you avoid guesswork. Keep in mind
that some crystals absorb liquid ink, which can cause harm to the gem, so
using the aluminum pencil will prevent such circumstances.
Never underestimate the use of drawing guidelines
with an aluminum pencil before you grasp the process properly. Once the marked
part is done, take your gem to the saw and cut it to the sketch mark you drew.
Always use dop sticks for smaller stones; this will save your fingers from unnecessary
hurting, and you can continue on the grinding level in case of large stones.
Shaping
How to shape gems.
Shaping requires gentle care; always use the
coarsest wheel on hard stones like corundum and smooth wheels on soft stones
like turquoise etc.
I know smooth wheels cut a bit slower, but it is vital to
be slow and produce something good than getting fast and spoiling everything.
That, of course, depends on how you see things.
Initializing the Cutting
Start your machine to a speed and get your wheel
wet to avoid problems like heating, friction, sparks, etc. For additional
lubrication, many manufacturers recommend using an additive. Use additive made
of rust preventative elements if only your machine is fully made of stainless
steel.
Focus on using the lower quarter of your machine
when grinding to avoid your stone from being snatched out of your hands from
above the centerline. This breaks the stone and causes harm, such as deep
cracks.
Take the help of a pair of calipers as you grind
the excess material down towards the sketch mark you drew. You should know
relying on templates isn't the best option, but it is not wrong since templates
are best for shapes but not accurate for dimensions.
Peeing the Apple
Peeling the apple is the next step you take after
shaping the outline. You should grind a bevel of about 45° and bring it 2/3rd
to 2/4th down the way button.
Continue with an additional grinding at about 60°
and make sure you leave the previous cuts visible. Continue the process
(peeling the apple) and increase the cutting of bevels at steeper angles until
the center of the slopes is met.
It is the hardest step, but it requires patience
to master the tiny area in the center that is missed during cutting, making the
cab fail to take a good polish. You should be very careful with those flat
areas or poorly domed areas in the center as they are the ones that show the
most.
Examine the stone on both sides and ends to
ensure the whole stone is domed, and watch it out after every step. Use finer
grits for any mistakes, as they are good at correcting where you might have
gone wrong.
Bezel Setting Preparation
Smoothing
If your gem's shape is exactly what you wanted,
the next thing will be sanding out the scratches from the coarser and other
rough stages. You should use 200, 600, and 1200 grit to complete the next
steps.
Keep inspecting the gem after every step examining the curvature to
avoid mistakes. Mistakes such as failing to remove all the coarse scratches
will leave you with a complete redo of the whole process or produce a
poor-quality winding up.
Always dry your gem to see clear progress or look
for a warm environment before starting since a wet or humid environment makes
it hard to view any progress. Or, if not, use abundant warm water and many
towels to dry out your hands and the stone.
Use 600 grit if you are working with silicon
carbide, which eventually becomes a finer grit for pre-polishing, thanks to its
faster wearing-out ability. However, it is advisable to use two belts 600, one
for shaping and another one for pre-polishing.
Make sure you highly focus on your pre-polishing
skills. The surface of your stone should be smooth so that no visible
scratching can be detected. Go back to the pre-polishing stage if at all you
are having trouble getting a high polish. Remember to use finer grits like
3,000 or 8,000 for much softer gems to get the best results, (Properly Charging Ceramic Laps, n.d.).
Cabochon Polishing
Usually, polishing is confusing, but it does get
fun as you continue to gain experience. Most new machines come with built-in
polishing systems, which is great for a beginner.
Tricks to Gem-cutting Trade
·
Cerium oxide works best for quartz and opals, but you should be mindful of
heat building up and damaging opals during the polishing stage.
· Use aluminum oxide soft side out on suede as this trick will put a high
polish on many materials better than those other methods.
· Use chromium oxide on leather or felt to polish Jade as it requires more
heat and friction.
Always aim for a mirror-like polish on all your
gems as it is the main prior clients or buyers look at to make a choice.
Reference:
Properly Charging Ceramic Laps. (n.d.). International Gem Society. Retrieved July 22, 2022, from https://www.gemsociety.org/article/advice-properly-charging-ceramic-laps/


Comments
Post a Comment
Thanks for commenting. Here at Gems Essence, we're glad that you are part of us.