Tools are devices that help to perform certain functions. Just like any other business, gems dealing has got simple to way complicated tools that enable dealers to carry out detailed work.
When you hear the word "gemology tools," a lot of you might think of caterpillars and explosives, but you'll be surprised how little you need these gem tools.
Some businesses hardly need any tools to run, but gems dealing isn't one of them.
From time to time, you will need one or more tools, also known as "gemology toolkit," by your side to help you out in your gems dealing.
When I started, one of the questions that used to strike my mind was... "why is there no all-in-one tool that can measure each and everything about gems at once?
I mean, technology is pretty advanced than ever before.
It just seemed a lot of work to carry almost 3-5 tools in my bag whenever I headed to the gems market.
But, it is worth it. Gems dealing is the type of business where a straightforward mistake like forgetting to carry your loupe can cost you a lot of money.
So, whether you carry a bag full of gem tools or just one, it makes absolute sense.
I have seen gems experts who have been in this game for over 20 years rely on gem tools to carry out different gems work, and it made me believe that its' not about experience or skills.
You will need gem tools no matter how good you are at gems.
That is enough to make you realize how you can't live without tools if gems dealing is something you want to take seriously.
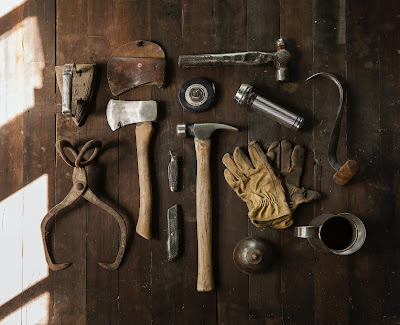 |
| Tools |
Are Gemology Tools Expensive?
I will start by answering, YES! Most of these gemology tools with great value are pretty much expensive. But, almost every expensive gemology tool has a cheaper version of it.
That could be a second-hand or used one, a less fancy one, etc.
Besides, there are many inexpensive tools of great value too. I would suggest that you act according to what your budget says.
Many of these tools are a one-time investment if you get good quality ones— so that I wouldn't feel shaken by the word "expensive."
Must-have Gemology Tools and their Price
As a gems dealer, there are tools you MUST have. They are compulsory if you are to be recognized as a gems dealer, namely:
- Tweezers
- Loupe
- Weighing scale
- Dichroscope
- Refractometer
- Spectroscope
- Chelsea filter
- Torch/ flashlight
Tweezers
A pair of tweezers should be the first thing you would consider buying if you think of stocking gems tools.
These $10-$30 tools help hold loose gems for proper and precise inspections.
That's so because sometimes oil and other substances from the people who initially touched the gem can affect a gem's quality.
The best type of tweezers is the iron ones since they leave no scratches on the stone during the holding.
 |
| Tweezers and a stone |
How to use a tweezer
- If it is the kind of tweezer with locks, then unlock it and put the stone between the clippers of the tweezers for holding.
- Lock the tweezer to hold the stone firmly, and there you go.
Loupe
Sometimes called a jeweller's best friend, a loupe is an essential tool most gems dealers associate with daily.
It is used in magnifying gems up to 10x. Doing so can help see what inclusions a gem might have, the nature of a stone, whether or not a stone is heated, and many more.
Loupes come in different kinds and types, such as the triplet, a unique loupe of three lenses that helps reduce distortion by the edges.
Colour correction loupe is another type with a special lens coating that enables you only to see natural colours.
A loupe costs about $25-$500.
How to use a Loupe
- Push your finger into the loup and push out the loupe.
- Look into the loupe while holding your gem under the loupe area.
- Leave your eyes both open to ensure excellent measurements.
- If the hand holding the stone isn't coming into focus, it's because you haven't supported it against the fingers of the hand that is holding the loupe.
- Keep on slightly twisting the stone until it comes into focus.
Weighing Scale
If you find yourself travelling for gems, you might have noticed how helpful a gem weighing scale is.
It does not have to be big like the average weighing scale. In fact, the perfect size for travelling is the size of a smartphone.
These small-sized gems are generally battery-powered, which ensures portability.
Gems are measured in carats, and to do so; you have to weigh the stone and divide it into carats. One carat equals 0.2 gms, but light weighing scales are made to weigh gems in their units (carats) precisely.
Gems weighing scales are as cheap as $30 to $350.
 |
| Table weighing scale |
How to use a gem weighing scale
- Please turn on your weighing scale; if it is electronic, and slightly place your stone on the weighing scale.
- If it is a small one that only weighs in carats, you will have to weigh them one by one, of your stones.
- If it is a table one, then put all of your stones and calculate the weight again in carats.
Dichroscope
A dichroscope is usually used to separate dichroic-coloured materials. It is used to see different colours in a gemstone since most gems are birefringent.
Birefringent means that when light enters a gem, it separates into two different rays, head in different directions, and at different speeds.
This effect brings about different colours a gem might possess. Some gems like amethyst don't necessarily need a dichroscope since their colours can be visible to the naked human eye.
But, gems like ruby are hard to see other colours inside of them, and that's when a dichroscope is useful.
Nevertheless, some gems aren't by-fringent, such as garnets, diamonds, and spinels. That is why you need a dichroscope to tell if a stone is or isn't birefringent.
With this tool, you can also figure out if the stone is fake or not.
A dichroscope is anywhere from $20-$50
How to use a Dichroscope
- Dichroscopes are primarily used to determine whether a stone is birefringent or not and to figure this out. You need to understand the reading from this kind of tool, clearly.
- To do this, you need to hold your stone underneath the dichroscope.
- Turn it around 360 degrees; the light will pass through the stone to the dichroscope, and you will notice two colours in two different windows.
- If such results are not seen or visible, turn your gem over and place it back in the glass of the dichroscope.
- Keep doing so about 3-5 times until you see the final results.
Refractometer
A refractometer is a tool used to measure the refractive index of a stone. With an accurate refractive index, you will tell the type of stone you are carrying.
Many gems have similar colours like emerald and tsavorite, which is confusing.
Using a refractometer, you can tell exactly the kind of stone you have by reading the tool's numerical data.
A refractometer's price could be $300-$1000, with a refractometer liquid that goes hand in hand with the tool costing a sum of $80.
How to use a Refractometer.
- Make sure you have got a clean flat, and polished surface. That is so because an unclean and uneven surface will reduce the contact between a gem and the refractometer fluid, producing wrong results.
- Rough gems can also be measured using advanced refractometers, so you don't have to worry about that.
- Get a refractometer contact fluid and pop it on the glass hemicylinder. This will avoid any possible air hiding between the faceted gem and the surface. By adding this fluid, internal reflection accuracy is guaranteed.
- Open the refractometer to expose the hemicylinder, remove the polarizing filter, and then insert the torch at the back of the refractometer.
- Put a small drop of the refractometer fluid on the hemicylinder of the refractometer.
- Place the gem on a hemicylinder. Also, try not to use any metal such as tweezers and other tools when placing your gemstone on the hemicylinder since it poses a risk of scratching it.
- Look through the eyepiece and search for a separating line between light and dark in the numerical scale results.
- Rotate the gem slightly and gently with your fingers to a full 360 degrees rotation and make sure your head is not moving to accurately see how many shadows edge you might be having on the calibrated scale.
- If you notice a single line that doesn't move, it is a single refractive stone. If there are two lines, maybe one of them moving and one still or even both moving, it is a double refracting stone.
- The readings have to be taken to 3 decimal places numerically. They are usually two or one shadow edges you can get from an entire test.
- Suppose the stone has two shadows or edges that are so close to each other. In that case, a polarizing filter will enable one shadow to show from another by simply rotating the polarizing filter.
NOTE: Stones with high RI than the fluid can't be tested on this kind of refractometer.
Calculating the Results
Take one figure away from the refractive indices to 3 decimal places, and you will get the stone's birefringence.
Spectroscope
A spectroscope is used to measure the absorption spectrum rate in a gemstone. When light is flashed into a gem, different colours are seen.
This can help know whether or not a stone is heated, and differentiate between similar-looking stones, such as spinel and ruby, etc.
The tool is cheap, about $20 to $60.
How to use a Spectroscope
- Measuring unpolished and rough stones is a challenging task without using a spectroscope.
- This tool can measure a stone in different ways, precisely measuring the absorption of the light that enters your stone.
/li>
- The spectroscope tends to display rainbow colours at the end when you look into it.
- For instance, if it's a sapphire, you will have a black line around the blue to indigo part of the spectrum, which means it's a genuine natural sapphire. If you don't see it, the stone is artificial.
- Different stones show different readings. Please take a gemology course for a more in-depth understanding of the gems.
Chelsea Filter
This essential tool will help you know what type of stone you will be buying—a Chelsea filter is for differentiating stones with exact striking resemblance, especially emeralds and their look-alikes.
Chelsea filter does so by determining whether or not a stone's colour is from chromium. The stone that gets its colour from chromium will show red or pink in the filter.
The tool's fluorescence is based on two factors which are either chromium or cobalt, and this will depend on the type of stones you will be dealing with.
A Chelsea filter costs around $20-$40.
How to use a Chelsea filter
- To test stones using this little tool, get a white background surface. It might be a piece of paper or cloth.
- Put your stones down on it.
- Shine a bright light onto the stone and look through the filter for differences.
Torch/ Flashlight
To a gems dealer, a torch is one of the portable tools you can never forget carrying.
This less expensive tool helps you carry out tests like searching for intrusions in your gem by providing the necessary light.
Almost all gem tests require light; that is why it is a crucial tool in gemology.
Torches are manufactured in different sizes, such as LED light and UV light ones, but it all depends on what you need.
Although the light from your phone can work too, if you want to get more professional, then buying a torch will be the right option.
Gemology torches are as expensive as $50-$200.
 |
| Torch |
How to use a torch
- Hold the stone in your hands, and pump light into it right from the back of the stone.
- Look closely to see if visible inclusions that the naked eye can see exist within the stone. It might be a valuable stone if the light passes through it smoothly due to clarity.
- If not, then it's not worth it.
Polariscope
It is one of the quickest tools for identifying gems. A polariscope uses its polarized light to show stressed areas in a stone.
Stressed areas are places within a gem, vulnerable to breaking or shattering during the cutting process. A naked eye can't detect these vulnerabilities; that's where a polariscope comes in.
It is an essential factor that every gem cutter eagerly looks at before cutting. A polariscope is about $100 to $250.
How to use a Polariscope
- Put your polariscope on the light source and turn it on.
- It works best in areas where you don't have many surrounding light sources.
- Place your stone in between these two filters and turn the polariscope to 360°.
- Look into the filter and search for the results.
- Sometimes a gem might form four fundamental patterns of light; it depends on the type of the stone.
- It is singly refractive if it appears dark after a whole 360° rotation and such stones are either cubic or amorphous.
- The stone is polycrystalline refractive if it appears light on one full 360° rotation. Such gems are zircon, chalcedony, etc.
- If the stone appears light and dark in a whole 360° rotation, it indicates that the gem is doubly refractive.
Gemology Tools for Gem Cutting/ Lapidaries
Lapidary isn't an easy task; in fact, I believe it's the second most complicated work in gems dealing. That is because it requires one to be extra keen and accurate about their work.
A simple lapidary mistake can cause a significant drop in the value of a stone. Or even break the stone into pieces hence leading to unplanned losses.
I might not name every cutting tool, but I will definitely state down the most useful and essential ones.
Here are the tools necessary for lapidary work:
- Twin saw
- Grinding wheel
- Faceting machine/ facetted
- Laps/ Sintered laps/Polishing laps
- Gas torch
- Cutting wax
- Saws
- Tile nippers
Occasionally, gem tools work in all fields of gem dealing. It is just that most of them are a version that is portable for travelling with.
Besides gems mining and cutting, all gems tools can be helpful in every sector of gems dealing.
Which tools do you think are your favourite? Comment below, and I will be glad to know your feedback.


Comments
Post a Comment
Thanks for commenting. Here at Gems Essence, we're glad that you are part of us.